Preparation and Requirements List
You'll need a personnel record of the person you want to add a page for. While this is not strictly required for the creation of a personal page itself, we will reference the person’s record in a later step.
Step 1: Create a New Page and Open the Page Properties Page
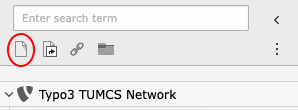
Create a new page by dragging the page icon to the corresponding position of the page tree, usually in Team below the Professor.
Upon placement you will be asked to insert the page name. The new page will be deactivated by default, meaning it will not be visible in your frontend navigation menu by now.
Select the new page and click on Edit page properties.
Step 2: Page Properties Page
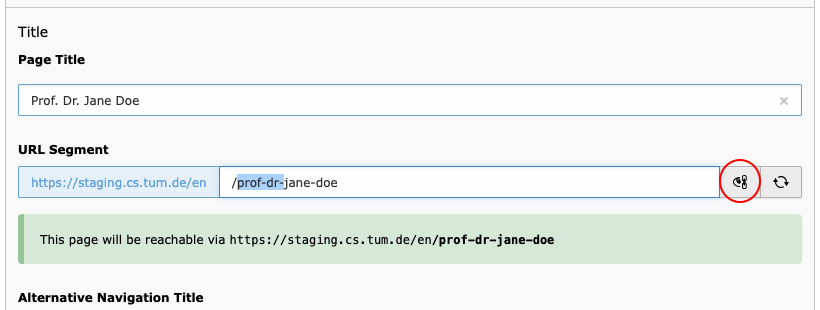
Please take care to remove any title from the URL Segment, which should only contain the first and last name of the person, combined with a hyphen.
To edit the URL Segment, click on the eye/chain symbol to the right of the input field to unlock its value. If the field consists of a long string of characters and numbers, press the reload button to the right first.
Next head to the Appearance tab.
Appearance
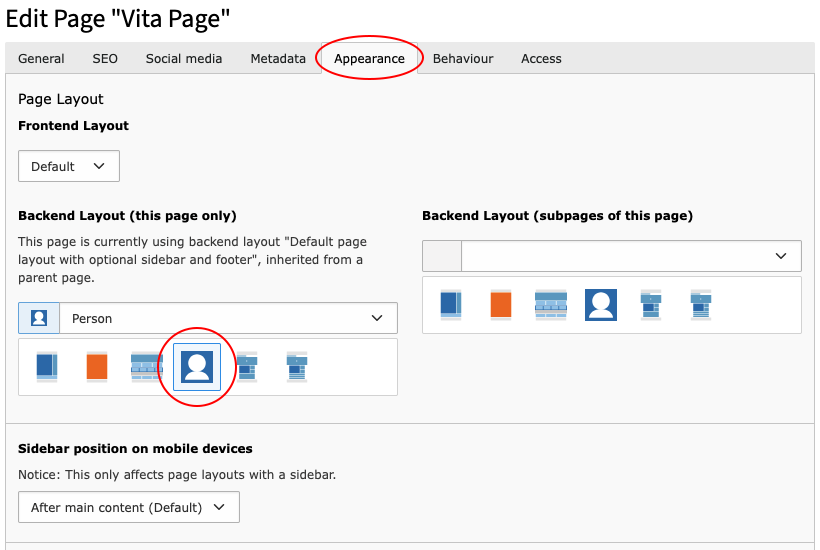
Change the Backend Layout to Person and save.
Access (optional)
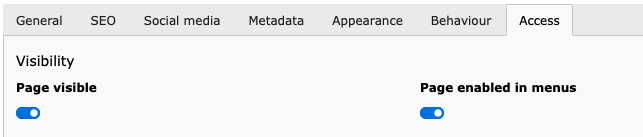
If you do not want the page to be part of your menu structure, head to the Access tab and deactivate the field Page enabled in menus.
This is recommended if you plan to have a lot of personal pages. You may also deactive only a part of your team’s members.
Layout overview
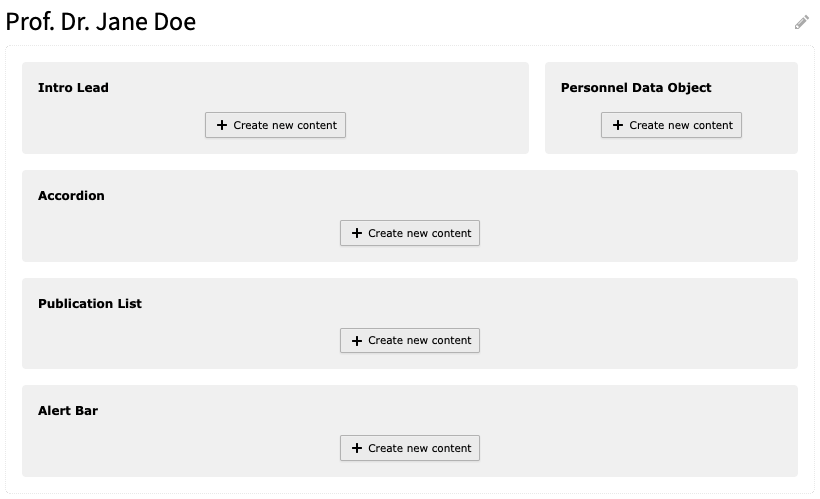
The page layout should now look like this.
The Person Page Layout features some unique content positions:
- Intro Lead: A place for text and other Content Elements of your choice, like the Content section on default layouts.
- Personnel Data Object: A section to display the corresponding personnel object data, including a picture.
- Accordion: Elements put here will automatically be rendered as an accordion. Only Text and List Container Content Elements are allowed.
- Publication List: This is a remnant from the mediaTUM plugin and may be removed in the future. However, text elements are also allowed.
Step 3: Select Personnel Record Page
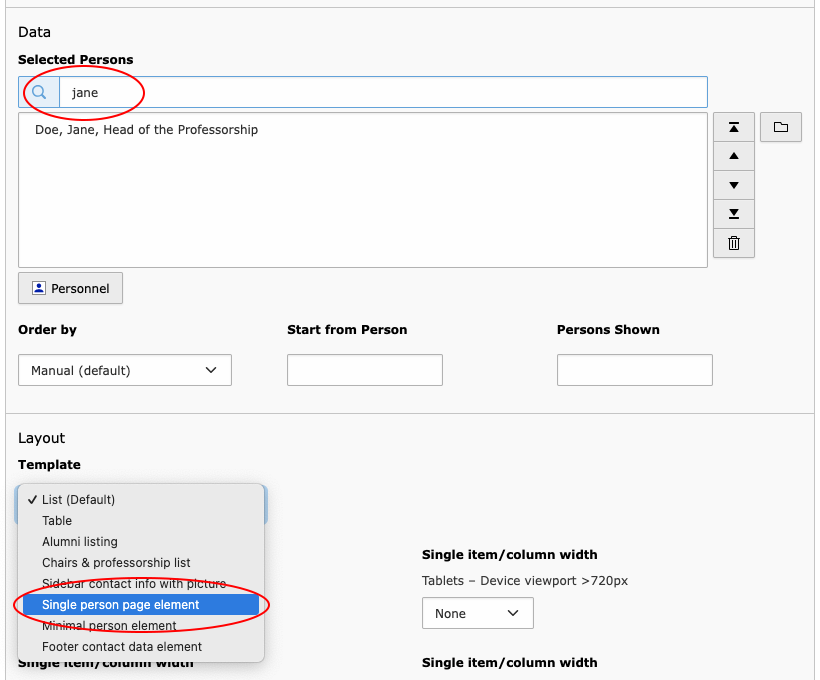
To display information from the person’s personnel records, click + Create new content in the Personnel Data Object section.
Select the Personnel: selected Content Element (the Text element may be used to place additional information above or below the personnel data).
Ignore the headline fields and scroll down to the Selected Persons field and choose your staff member.
Be sure to change the Template to Single person page element. You may further customize what dataset you want to display with the fields below in the form.
Step 4 (optional/best practice): Adding vita and other tabular data Page
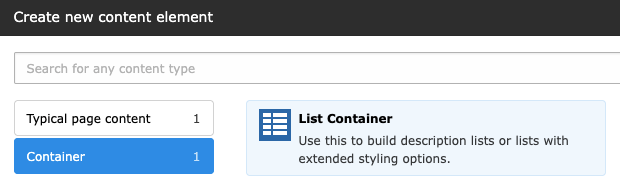
The best way to fill in tabular vitae is by using the List Container element.
Click on the + Create content Element button in the Accordion section and select the List Containter Element from the container tab.
This will create the container without opening its properties, so you'll have to open it by yourself.
Configure the List Container
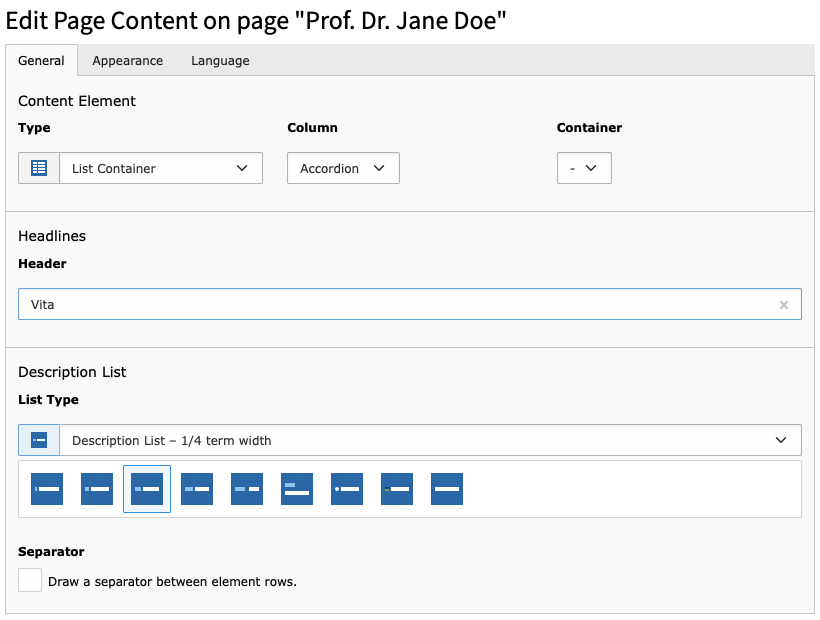
Give the container a title – it will serve as the accodion item’s heading. Since the styling is done by the system, most of the options the usual Headlines form are hidden.
Choose a list type. Description List – ¼ term width is a good starting point for a tabular curriculum vitae.
Save and close.
You'll find more information on the List Container list types in the in-depth documentation.
Add List Items
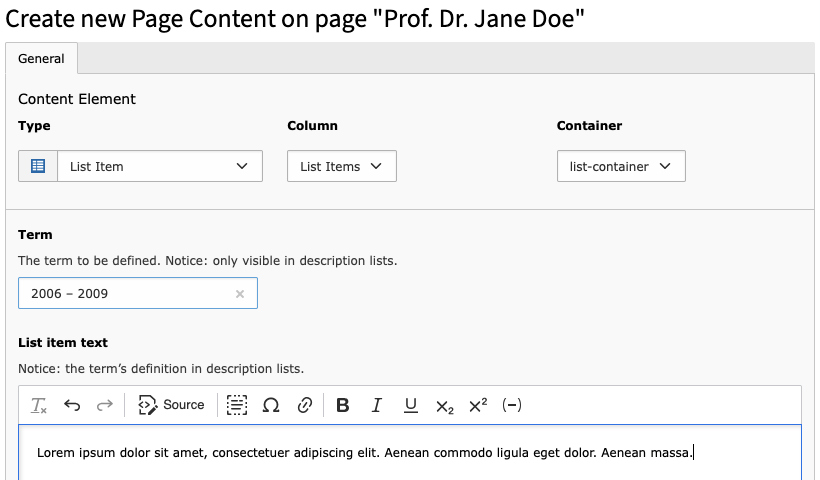
Click on the + Create content Element button in the List Container you just added. There will only be one Content Element option to choose from – List Container Element.
It depends on the selected List Type in the Container options which fields of the form will be displayed.
If you chose Description List – ¼ term width the Term and List item text fields will be active.
In case of a curriculum vitae, fill in the time span in the Term field. Then enter the occupation in the List item text field.
After saving, you may also use the + New button at the top of the form if you want to add more items.